Home/Curriculum resources/Astronomical knowledge in art/Activity 2 - Night sky collage
Learning Area:
The Arts
Year levels:
Level 7, Level 8
Suggested timing:
At least three lessons

Activity 2 - Night sky collage
This activity is a part of the Astronomical knowledge in art resource.
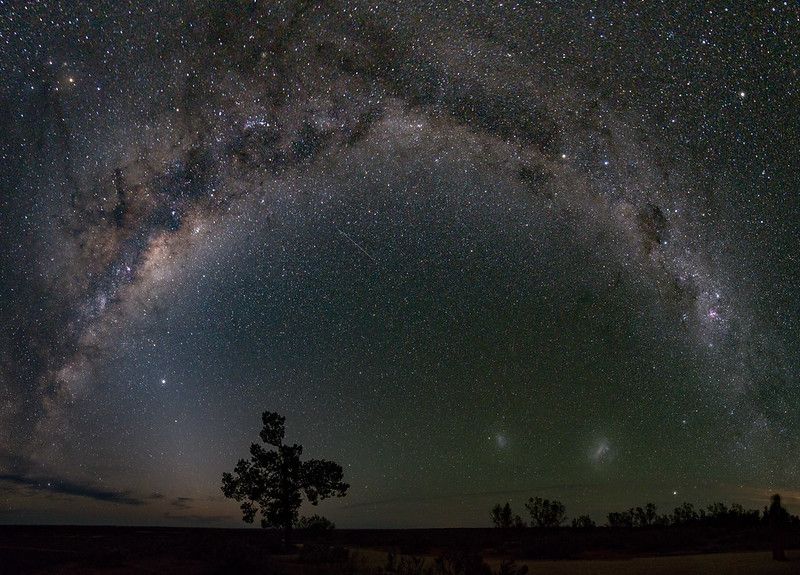
The Milky Way galaxy arches over Lake Mungo, Mungo National Park. Barkandji/Paakantyi, Mutthi Mutthi and Ngiyampaa country. Photographer: Peter Lieverdink. Source: Flickr. License: CC BY-NC-SA 2.0
This activity encourages students to think about how they would translate their connection and understanding of the night sky in an artistic form. The practical classroom suggestions easily translate to many media allowing a teacher to work with their own artistic strengths and the resources available at the school.
Required resources
A3 paper (white and coloured)
wax crayon/candle
coloured inks
polystyrene
other resources available at the school.
Suggested timing
At least 3 lessons
Step by step guide
Step 1: Study and create a map of the night sky
Students study the night sky and create their own map of the night sky from their home.
Students will translate this map of the star systems to a large blank piece of paper. Using a wax crayon or candle, they will place star systems and the moon into this night sky, across the top two thirds of a piece of watercolour or heavy gsm paper.
Using dilute inks of different colours representing the night sky (black, dark blue, purple and grey) students will create a wash background for their night sky. The areas drawn in wax will repel the ink and shine through like stars.
Step 2: Create a land or cityscape
Students draw a horizontal land or cityscape that relates to their home on a piece of paper. The drawing should extend the width of the piece of paper.
Students can then trace the drawing onto a piece of polystyrene (from packaging).
Students can use the foam as a printmaking plate and roll it up with block printing ink.
Students can then print multiples of the image on different coloured pieces of paper, representing different seasons. These pieces of paper will be layered to create a sense of depth on the final work.
Step 3: Combine elements together
Once completed, the students should layer and adhere their landscape onto the bottom third of the picture.
Extension: This activity could be developed further to create a diorama with changing sets, for different times of the evening and lunar positions or dates within the lunar calendar. Students could make small ‘stop motion’ video works, using the diorama to tell the narrative of the Moon or to talk about the milky way or larger cosmos.